Battle of Coronel : The Royal Navy’s Worst Loss of WW1
The Battle of Coronel was a naval engagement fought between Germany and the United Kingdom in the Atlantic Ocean bordering Chile during World War I.
The confrontation arose when British ships encountered German ships from the East Asia Squadron prepared to perform attacks on shipping routes across the ocean.
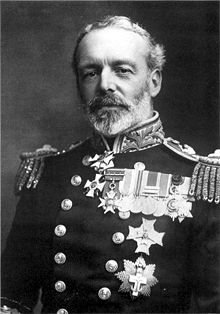
British forces were led by Admiral Christopher Cradock, a Royal Navy officer who according to historian Paul G Halpern had gained a reputation for “gallantry”.
Christopher Cradock
Cradock’s forces consisted of two armored cruisers, the HMS Good Hope and Monmouth, light cruiser HMS Glasgow, and an outdated battleship, the HMS Canopus. The force was also accompanied by the Otranto, an armed merchant ship.
HMS Good Hope (pictured) in late August 1914 IWM
Cradock was under the impression that if they encountered any enemy vessels on their recon mission to protect the shipping lanes, they were to fight until the end.
Led by Admiral Maximilian von Spree who would go on to fight in WW2 as well, the German force and its modern task force heavily outgunned the opposing British fleet.
It consisted of two armored cruisers: the SMS Scharnhorst and Gneisenau, as well as three light cruises: the SMS Dresden, Leipzig, and Nürnberg. To add to the plight of the British, most of the sailors on the British vessels were inexperienced, pulled from the reserves.
Gneisenau
In contrast, the German fleet was manned by sailors who had already gained recognition for their aptitude before the war. Technologically speaking, the Germans also had better heavy armaments, with a total of sixteen 8.2-inch guns compared to the total two 9.2-inch British guns.
On November 1st, 1914, the SMS Leipzig first spotted smoke from British ships, and shortly after, HMS Glasgow observed smoke from the Germans.
At first, the British fleet decided to flee, but the slower Otranto began to lag behind so Cradock was forced to decide between fighting and abandoning the vessel.
Although Cradock was vastly underpowered, he chose to engage the Germans. To this day, it is unclear why he made this decision, but many of Cradock’s colleagues maintain that he was unable to avoid action.
The heavy 8.2-inch and 9.2-inch guns of each respective side opened fire first, but within the opening moments of the battle, a British 9.2-inch gun was struck and taken out of the action.
Furthermore, the remaining 6-inch British guns had a hard time firing as the rough seas meant that opening the gun doors would lead to flooding.
Throughout the day, the Germans scored more and more hits on the British ships, and this gave a massive advantage to the German gunners as night fell because the HMS Good Hope and Monmouth were ablaze and easy to spot. The Otranto retired from the fight as its armaments were useless at such range.
The HMS Good Hope was the first to sink: her front section exploded after continued bombardment.
The three German cruisers engaged the HMS Glasgow, but the weaker cruiser armament wasn’t enough to cause significant damages. The HMS Monmouth had also taken a beating and stopped firing, while attempting to beach itself on the coast.
However, before it could reach land, it was found by SMS Leipzig and subsequently sunk after refusing to surrender. The HMS Glasgow was able to escape south with only minor flooding; its captain John Luce stated that there was nothing the light cruiser could do at that point.
The British, however, suffered heavy losses of 1,660 killed in action and 2 armored cruisers sunk. Despite this initial setback, the shock of this battle led the British high command to dispatch a larger fleet that would win a decisive battle near the Falklands against the same enemy.


